Modify Color
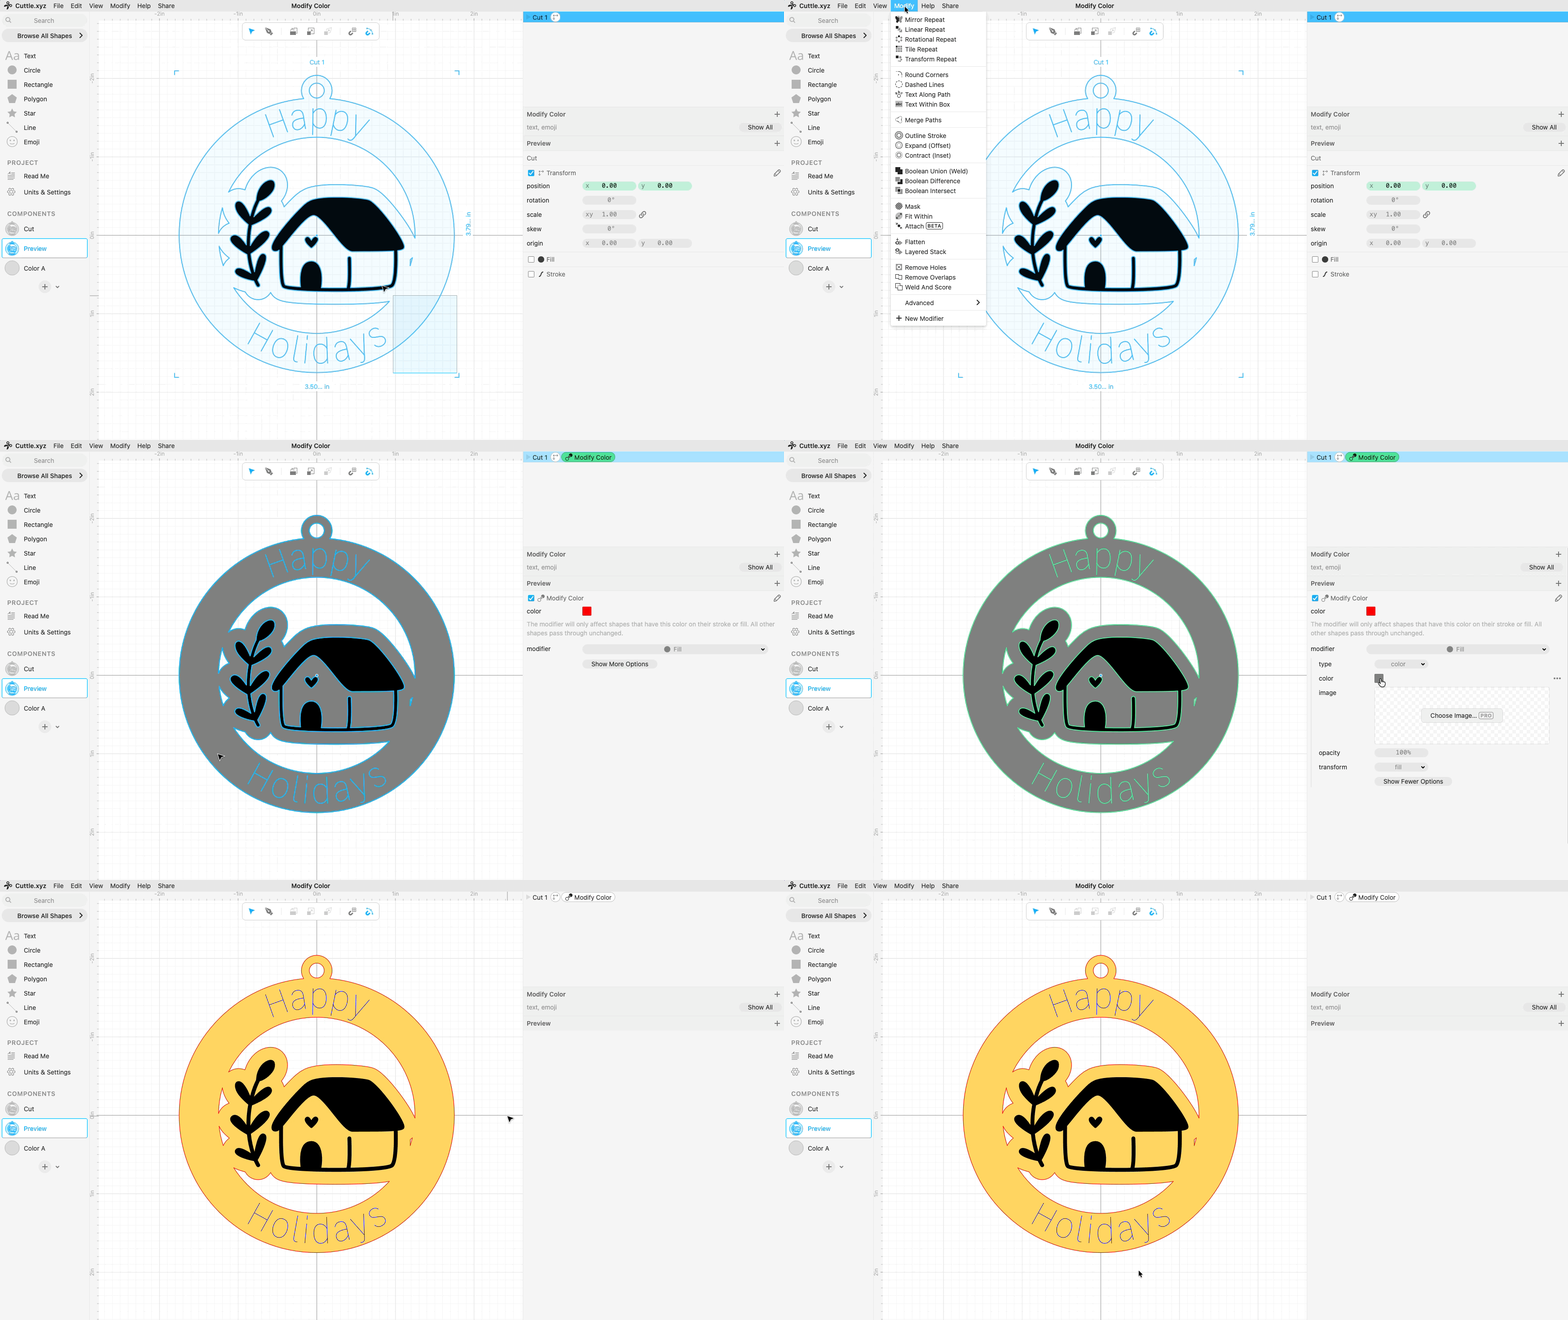
With Modify Color you can apply a modifier only to shapes of a specific color, while leaving other shapes untouched. This is useful when an operation like Weld or changing fill color would otherwise wipe out features like scores and engraves.
The video above demonstrates how to use Modify Color with some practical examples like making template previews, welding shapes, adding holes and turning scores into dashed lines.
How to use
- Select your shapes.
- Go to Modify > Advanced > Modify Color.
- Choose the color to target (red by default), this will target shapes with that fill or stroke color.
- Choose the modifier or transformation to apply to that color. The default is Fill but you can pick any modifier.
- Click Show More Options to adjust the settings of the applied modifier.
Troubleshooting
I applied a fill with Modify Color and I still can’t see other features:
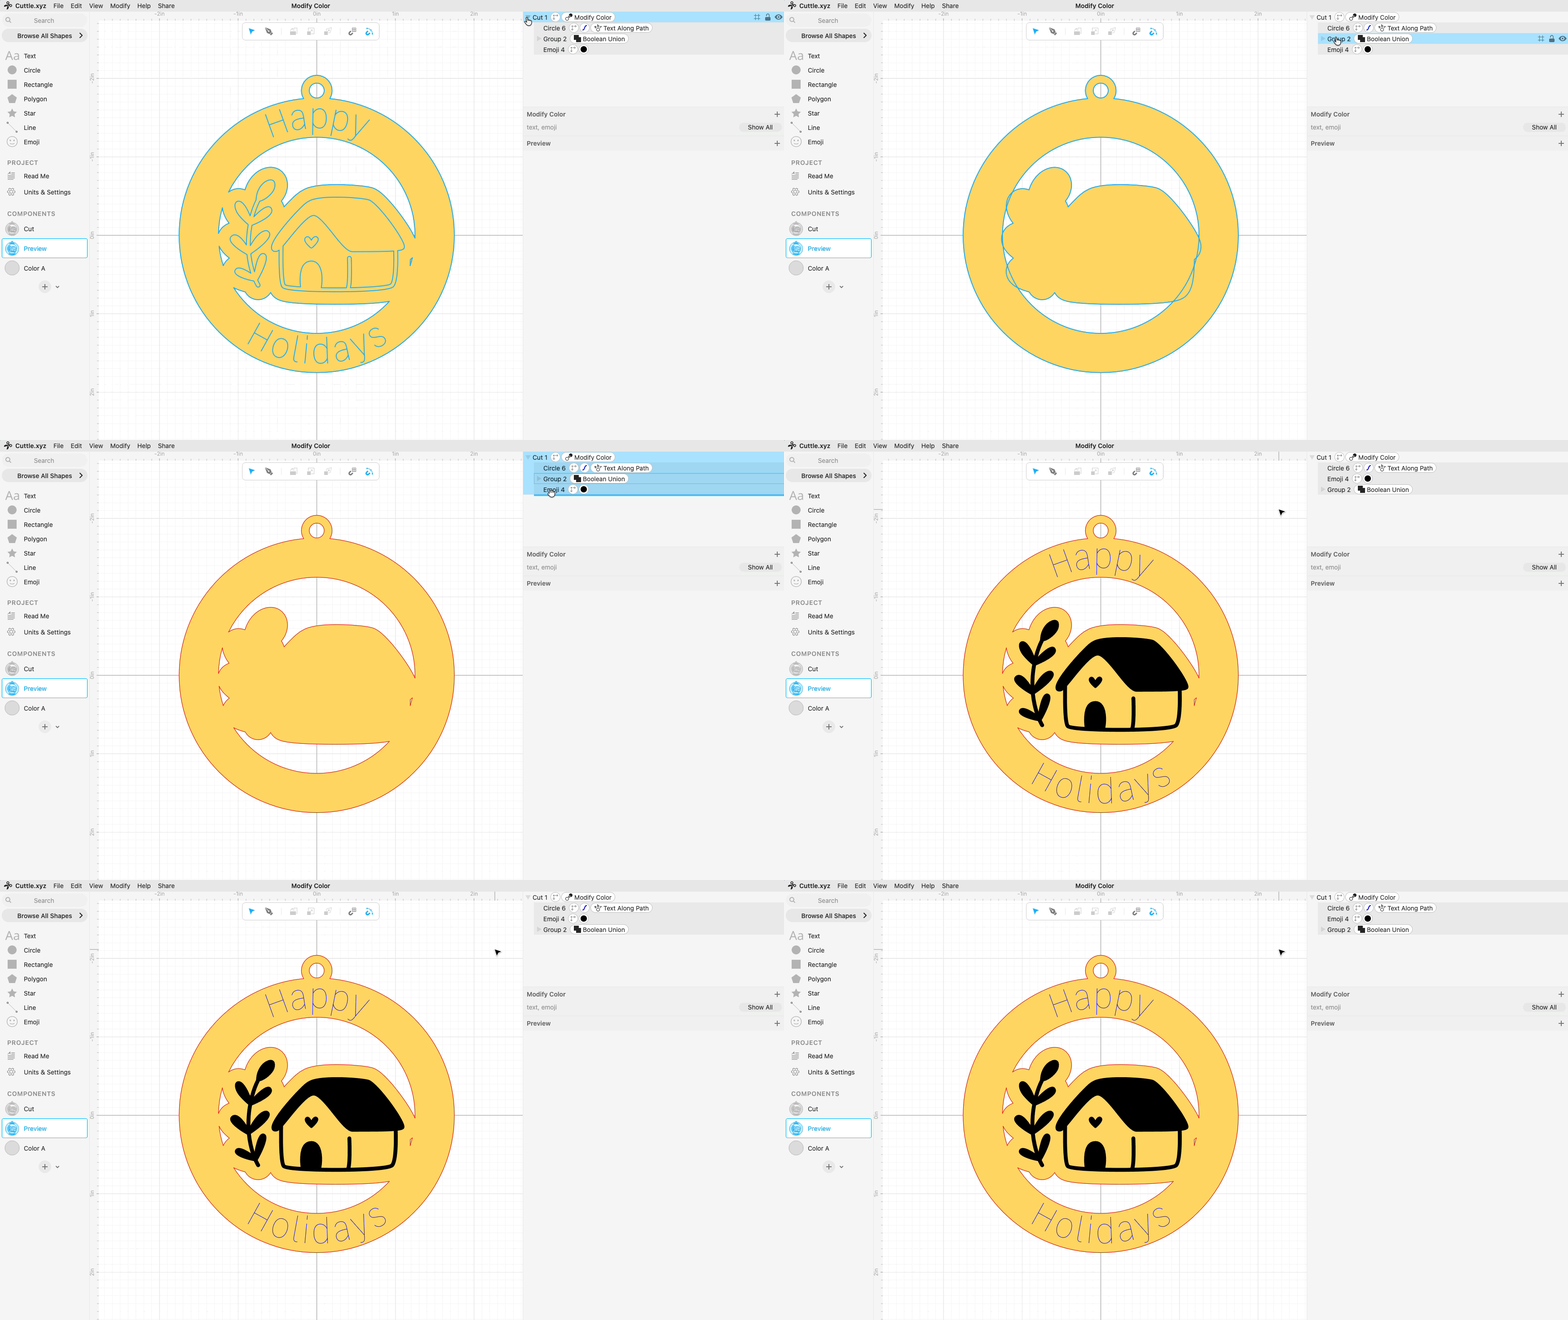
Check the order of your layers. If the top-most shape covers the shapes that contain your other features you won’t be able to see them. The solution: move the shape with the fill all the way to the bottom of the stack:
When making a template preview I tried to apply a stroke to my shapes and all Modify Color changes were lost:
After using Modify Color to change the fill of your shapes like this:

You might be tempted to add a regular stroke color which causes the previous fill to be lost. Notice that the stroke color gets applied before the color targeting happens, so Modify Color doesn’t see any red shapes.

The solution: use a second instance of Modify Color to set the stroke instead.
